


DIY dog toys might sound like a crafty way to save money and cut back on household waste. Most owners do not realise just how much fun and mental stimulation a simple homemade toy can offer their dog. In fact, dogs with access to a variety of toys can show up to 50 percent more active playtime at home compared to those with only one or two options. So while expensive pet shop toys often disappoint, your own creativity could spark hours of tail-wagging excitement.
Table of Contents
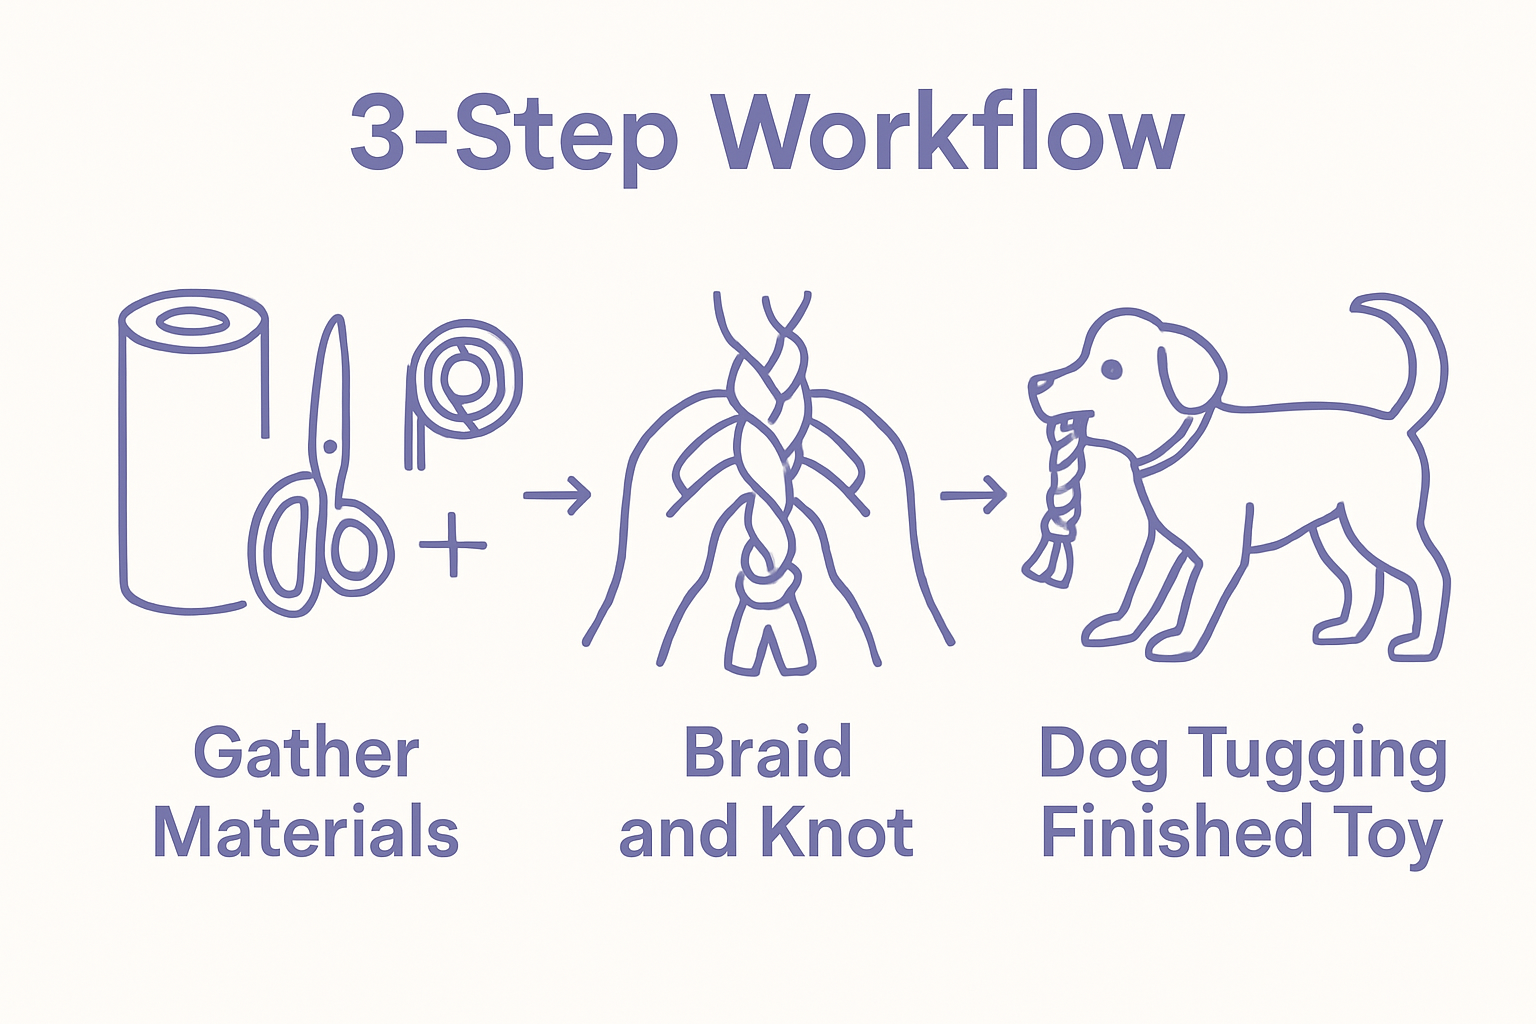
- Step 1: Gather Your Materials And Tools
- Step 2: Choose A Toy Design That Suits Your Dog
- Step 3: Follow The Instructions To Create The Toy
- Step 4: Test The Toy For Safety And Durability
- Step 5: Introduce The Toy To Your Dog And Observe
- Step 6: Adjust The Toy Or Create New Designs As Needed
Quick Summary
| Key Point | Explanation |
|---|---|
| 1. Gather safe materials | Use old fabrics, tennis balls, and ropes to create durable, cost-effective toys, ensuring they are safe for your dog. |
| 2. Match toy to dog’s needs | Select or design toys based on your dog’s age, energy level, and chewing habits for better engagement and enjoyment. |
| 3. Securely construct the toy | Ensure tight braids and stitches to prevent unraveling, and check for any parts that can pose choking hazards. |
| 4. Conduct safety tests | Inspect the toy for loose threads and weak seams, simulate play, and observe durability to ensure it can withstand your dog’s play style. |
| 5. Observe and adjust as needed | After introducing the toy, note your dog’s reactions and modify the design or create new ones to enhance engagement and safety. |
Step 1: Gather Your Materials and Tools
Before diving into creating delightful DIY dog toy ideas, you will need to assemble a collection of materials and tools that will transform ordinary household items into exciting playthings for your furry friend. The beauty of crafting homemade dog toys lies in the ability to repurpose items you already have at home, saving money and reducing waste while providing engaging entertainment for your pup.
Start by conducting a quick survey of your home for potential toy-making materials. Old t-shirts, towels, and soft fabrics are excellent bases for braiding, knotting, and creating tug toys. Cotton rope, if you have any from DIY or gardening projects, makes an exceptional material for durable chew toys. You might also find useful supplies in your kitchen drawers or craft storage — think wooden spoons, tennis balls, empty plastic bottles, and cardboard tubes.
Your basic toolkit for these projects should include a few essential items to make crafting smooth and safe. Sharp fabric scissors will be crucial for cutting materials cleanly, while a measuring tape helps ensure consistent sizing. For added security and durability in your toys, have a sewing needle and strong thread on hand, though many toys can be created without sewing.
According to Battersea Dogs & Cats Home, safety is paramount when creating homemade dog toys. Always inspect your materials carefully, removing any potential choking hazards like loose threads, small buttons, or decorative elements that could detach. Ensure fabric edges are securely fastened and that no sharp edges remain from cutting processes.
Before beginning your DIY dog toy project, gather these recommended materials:
- Clean, soft fabric pieces (cotton t-shirts, fleece blankets)
- Scissors
- Measuring tape
- Strong thread
- Tennis balls
- Old rope or thick yarn
- Optional: Sewing needle
By taking time to collect and prepare your materials thoughtfully, you are setting the stage for creating engaging, safe, and fun toys that will keep your canine companion entertained and mentally stimulated.
Below is a table summarising the main materials and tools you might need for creating DIY dog toys, along with their intended purposes and notes for safe crafting.
| Material/Tool | Purpose | Notes on Use |
|---|---|---|
| Old t-shirts/fabric | Braiding and tug toys | Ensure fabric is clean, no loose parts |
| Scissors | Cutting materials | Use sharp, fabric-only scissors |
| Measuring tape | Ensuring consistent sizes | Helps maintain toy safety and size |
| Strong thread | Reinforcing durability | Needed for toys requiring sewing |
| Tennis balls | Ball-based toys or treat holders | Confirm no splits or cracks |
| Old rope/thick yarn | Chew and tug toys | Should be cotton, check integrity |
| Sewing needle | Assembling or repairing toys | Optional; necessary for sewing tasks |
Step 2: Choose a Toy Design That Suits Your Dog
Selecting the perfect DIY dog toy requires understanding your furry friend’s unique personality, play style, and individual needs. Not all dogs enjoy the same type of play, so observing your pup’s natural behaviors and preferences will help you craft a toy that will truly capture their interest and provide maximum enjoyment.
Puppies and high-energy dogs typically love interactive toys that challenge them mentally and physically. For these playful companions, consider designs that encourage movement and problem solving, such as puzzle toys with hidden treats or braided rope toys that allow for vigorous tugging and chasing. Older or more relaxed dogs might prefer softer, gentler toys that provide comfort and light stimulation.
Consider your dog’s chewing intensity when designing a toy. Dogs with powerful jaws will require more durable materials like thick braided fabric or reinforced rope, while smaller or gentler dogs can enjoy lighter constructions. For aggressive chewers, multiple layers and tight stitching become crucial to prevent rapid destruction and potential choking hazards.
According to the UK government’s Code of Practice for the Welfare of Dogs, toys should provide mental stimulation and match a dog’s individual characteristics. This means tailoring your DIY toy design to your specific dog’s size, breed, and temperament.
For inspiration on keeping your pup entertained, read our guide on fun dog birthday party ideas which includes additional insights into dog play and engagement.
Key considerations when choosing a toy design include:
- Your dog’s age and energy level
- Chewing strength and play style
- Size of your dog
- Potential safety risks
- Individual preferences and past toy interactions
Remember that successful DIY dog toys are not just about the materials, but about understanding and catering to your dog’s unique personality and play preferences.
Step 3: Follow the Instructions to Create the Toy
With your materials gathered and design selected, you are now ready to transform ordinary household items into an exciting new plaything for your canine companion. Precision and patience are key during this crafting process, ensuring that your DIY dog toy is not only fun but also safe and durable.
Begin by preparing your workspace with all materials within easy reach. If you are creating a braided rope toy, lay out your fabric or rope strips and carefully trim them to consistent lengths. For those making a knotted toy, ensure your cuts are clean and even, removing any loose threads that could potentially become choking hazards. Careful preparation prevents potential problems later in the construction process.
When joining materials, use techniques that create secure connections. For fabric toys, tight braiding or multiple knots will prevent unravelling during enthusiastic play. If sewing is part of your design, use strong thread and ensure stitches are close together and reinforced. Double stitching key stress points adds significant durability to your homemade creation.
According to King’s College London’s workshop guidelines, creating dog toys requires attention to detail and a focus on safety. Take your time with each step, checking your work frequently and ensuring no loose components could potentially detach during play.
For inspiration on creating engaging pet accessories, explore our dog birthday party ideas which showcase creative approaches to pet entertainment.
Critical verification steps for your completed toy include:
- No loose threads or hanging pieces
- Secure knots and connections
- Appropriate size for your dog
- No sharp edges or potential pinch points
Once completed, inspect your toy thoroughly before presenting it to your dog. A well-crafted DIY toy can provide hours of safe, engaging entertainment, strengthening the bond between you and your furry friend while offering mental and physical stimulation.
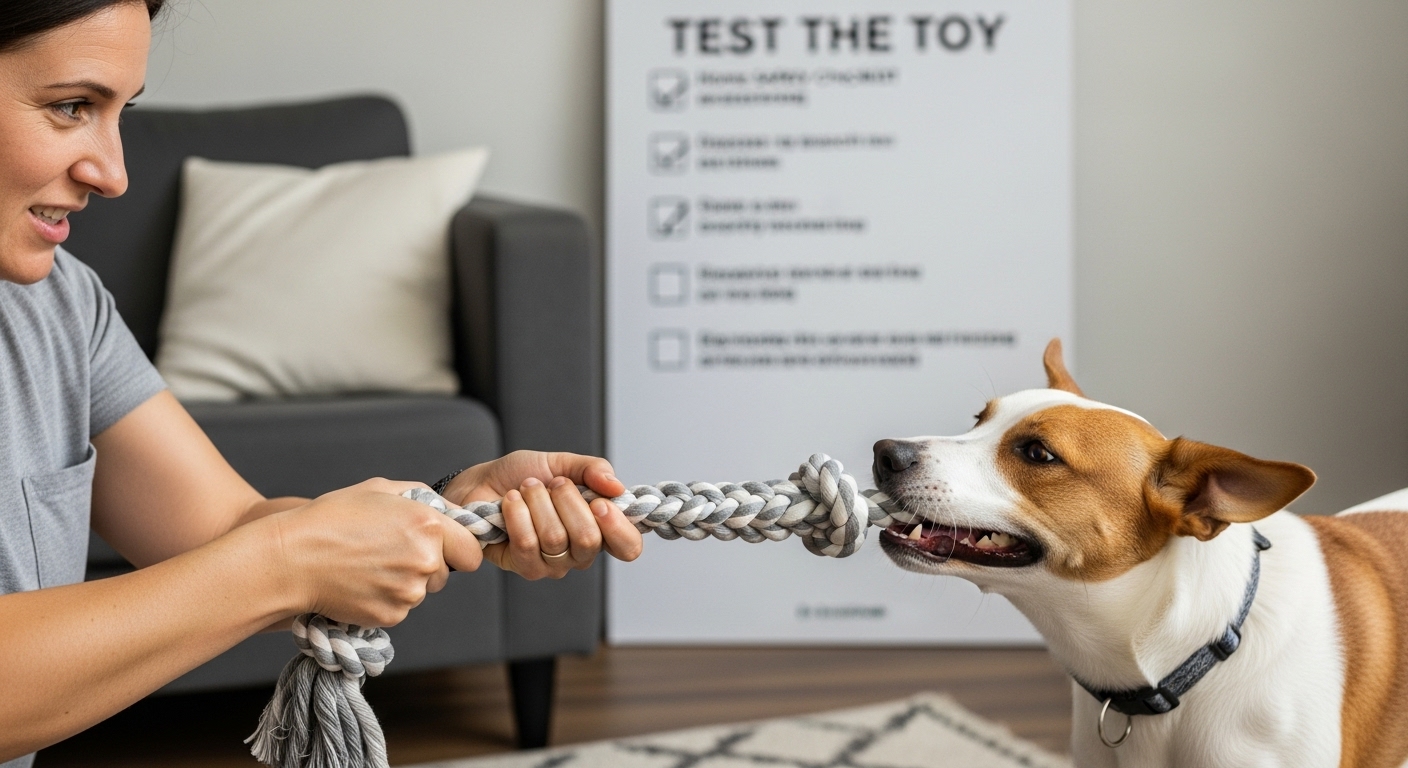
Step 4: Test the Toy for Safety and Durability
After crafting your DIY dog toy, a comprehensive safety assessment is crucial to ensure your furry friend can enjoy their new plaything without risk. Safety testing is not optional but an essential step in responsible pet toy creation. Your goal is to identify and eliminate potential hazards before introducing the toy to your dog.
Begin by performing a thorough visual and tactile inspection of the toy. Carefully examine every inch of the toy, looking for loose threads, weak seams, or areas that might easily unravel during play. Pull gently on different sections to test the strength of your connections and ensure no pieces can be easily torn off. For braided or knotted toys, tug firmly at the knots to confirm they will withstand enthusiastic chewing.
Next, simulate your dog’s play style by subjecting the toy to controlled stress tests. If you have created a tug toy, pull it firmly in different directions to mimic how your dog might interact with it. For chew toys, press and twist the material to check its resilience. Pay special attention to potential weak points where the toy might break or shed small pieces that could become choking hazards.
According to the RSPCA’s guidelines on pet toy safety, toys should be appropriate for your dog’s size and chewing habits. Consider your dog’s individual characteristics when assessing the toy’s durability. A toy that works for a gentle small breed might quickly disintegrate in the mouth of a powerful, aggressive chewer.
For inspiration on creating engaging pet accessories, check out our dog birthday party ideas which offer creative insights into pet entertainment.
Critical safety verification checklist:
- No loose threads or hanging pieces
- Knots and connections are secure
- Material cannot be easily torn or shredded
- No sharp edges or potential pinch points
- Appropriate size for your specific dog
Remember, a well-crafted DIY dog toy is a balance between creativity and caution. Your careful testing ensures that playtime remains a joyful, safe experience for your beloved canine companion.
To help you review and adapt your DIY dog toy for safety and effectiveness, here is a checklist table highlighting key verification steps and their purposes before giving the toy to your pup.
| Verification Step | Purpose |
|---|---|
| No loose threads or hanging bits | Prevents choking or ingestion risks |
| Knots and connections are secure | Ensures toy does not unravel during play |
| Material cannot be torn easily | Maintains durability for rough play |
| No sharp edges/pinch points | Avoids injury to your dog |
| Size is suitable for your dog | Reduces the risk of accidental swallowing or harm |
Step 5: Introduce the Toy to Your Dog and Observe
The moment has arrived to present your lovingly crafted DIY dog toy to its intended recipient. Initial introduction is crucial and can significantly impact your dog’s engagement and enjoyment of the new plaything. Choose a calm, familiar environment where your dog feels comfortable and free from distractions during this first interaction.
Start by allowing your dog to approach the toy naturally. Avoid forcing interaction or creating unnecessary excitement. Hold the toy casually, letting your dog’s curiosity guide the initial exploration. Some dogs might be immediately interested, while others may need gentle encouragement. If your pup seems hesitant, try softly wiggling the toy or showing mild enthusiasm to spark their interest without overwhelming them.
Carefully observe your dog’s interaction with the toy. Watch for signs of genuine engagement versus potential discomfort or disinterest. A positive response might include tail wagging, playful nudging, or gentle chewing. Conversely, if your dog appears anxious or completely ignores the toy, do not be discouraged. Some dogs require multiple introductions or might prefer different play styles.
According to a study published in Animal Welfare, rotating toys can help maintain a dog’s interest and provide ongoing mental stimulation. Consider introducing the toy during different times of the day and in various settings to gauge your dog’s sustained engagement.
For additional insights into puppy training and behaviour, explore our guide on teaching puppies to settle which offers valuable techniques for managing your dog’s interactions.
Key observations to note during toy introduction:
- Dog’s initial reaction and body language
- Length of sustained interest
- Specific play styles demonstrated
- Any signs of stress or discomfort
- Potential need for toy modification
Remember that every dog is unique, and patience is key in discovering what type of play and toys truly captivate your furry companion’s heart and mind.
Step 6: Adjust the Toy or Create New Designs as Needed
Crafting the perfect DIY dog toy is an iterative process that requires keen observation and willingness to adapt. Flexibility is key in creating a toy that truly engages and satisfies your furry friend. After your initial introduction and observation, you may need to make subtle or significant modifications to ensure the toy meets your dog’s unique play preferences and safety requirements.
Begin by carefully examining how your dog interacted with the toy. Did they lose interest quickly? Were certain sections more appealing than others? Subtle changes can make a significant difference in a toy’s attractiveness. For aggressive chewers, consider reinforcing weak points with additional braiding or stitching. If your dog seemed hesitant, you might want to adjust the toy’s texture, size, or add an element of unpredictability that captures their curiosity.
Some dogs require more mental stimulation, so consider incorporating puzzle elements into your design. This might mean creating additional knots, adding hidden treat compartments, or varying the toy’s texture to make it more engaging. Observe your dog’s natural play instincts and use them as a guide for future toy modifications. A toy that challenges your dog mentally can be just as important as one that provides physical entertainment.
According to the UK government’s Code of Practice for the Welfare of Dogs, toys should be regularly inspected and adjusted to ensure they continue to provide safe and appropriate enrichment. This means checking for wear and tear, potential weak points, and ensuring the toy remains suitable for your dog’s current size and chewing strength.
If you’re looking for more ideas on keeping your pup entertained, check out our guide on teaching puppies to settle, which offers additional insights into dog engagement and play.
Key considerations when adjusting your DIY dog toy:
- Assess toy durability after initial use
- Check for potential safety hazards
- Observe your dog’s specific play preferences
- Consider adding mental stimulation elements
- Be prepared to create entirely new designs
Remember that creating the perfect dog toy is a journey of discovery. Each iteration brings you closer to understanding your dog’s unique play style and preferences, ultimately strengthening the bond between you and your beloved companion.
Upgrade Playtime for Your Pup with Pup Chic Boutique
You have taken the first step to create a safer, happier playtime by crafting your own DIY dog toys. Yet, if you have ever struggled with durability, finding the right materials, or want to offer your dog even more variety, Pup Chic Boutique is here to help. Our collection is inspired by real dog owners facing the same challenges—keeping dogs both entertained and safe. We understand the importance of quality, individual play needs, and stylish comfort for every four-legged friend. If your dog tears through homemade toys a bit too quickly or if you are searching for accessories that match your pup’s energy and personality, you will love our UK-designed essentials.
Discover our full range of stylish, high-quality dog accessories designed for practical play as well as everyday walks. Explore products that stand up to rigorous tugging and chewing while blending chic designs with functional comfort. Ready to make your dog’s playtime even better? Visit Pup Chic Boutique now to see what a difference the right accessory can make for you and your pup. Shop today and make every play session a memorable one.
Frequently Asked Questions
What materials can I use to create DIY dog toys?
You can use old t-shirts, towels, soft fabrics, cotton rope, tennis balls, empty plastic bottles, and cardboard tubes. These materials allow you to repurpose household items into fun toys for your dog.
How do I ensure my DIY dog toys are safe for my pet?
Inspect all materials for potential choking hazards like loose threads or small components that could detach. Make sure edges are securely fastened, and check that the toy is appropriate for your dog’s size and chewing habits.
What factors should I consider when choosing a design for my dog’s toy?
Consider your dog’s age, energy level, play style, and chewing strength. Tailor the toy’s size and design elements to match your dog’s unique preferences and needs for maximum enjoyment and safety.
How can I assess the durability of my homemade dog toys?
Perform a thorough inspection for loose threads and weak seams. Simulate your dog’s play style by tugging or pressing the toy to ensure it can withstand rough play without breaking or shedding small pieces.